At the risk of stating the obvious, I have found that the work of making lutes consists largely of making things. Cut a rose, carve a bridge, turn a set of pegs--there are just a lot of different items that need to be produced. That's good: I like making things, and each day in the shop is different, so there's never a dull moment. That being said, however, you can make a lot of things without actually making a lute. There comes a time in the process when you have to start putting some of these things together.
Most of the time, that will involve using hide glue. Perhaps you're familiar with this stuff; if not, I'll briefly acquaint you.
Hide glue is made from the hides and connective tissues of certain animals (and yes, horses are prime candidates for this job). It's been used by woodworkers for thousands of years, though not too many woodworkers use it these days--synthetic glues are more convenient and readily available. (Incidentally, my mom tells me that my Swedish great-grandfather, a woodworker who came to Canada in the early years of the last century, used to make his own hide glue.)
But nothing beats hide glue for putting together a lute, for a lot of reasons. It dries hard and makes a very strong joint, yet with a little water and heat (and time, and much care!), any joint on a lute may be reversed. This is especially important where the soundboard joins the body. Most lutes will, at some point during their lifetime, need to have the soundboard removed for repairs or action adjustments, and this difficult job is made a little easier if hide glue's been used.
Here's what it looks like in granular form, straight out of the bag.

Put a scoop of this stuff in a baby-food jar, add a little water and swish it around. Leave it for an hour or two to let the glue absorb the water, then heat the jar in a pan of water. The glue becomes liquid, and it's ready for use. So get to work!

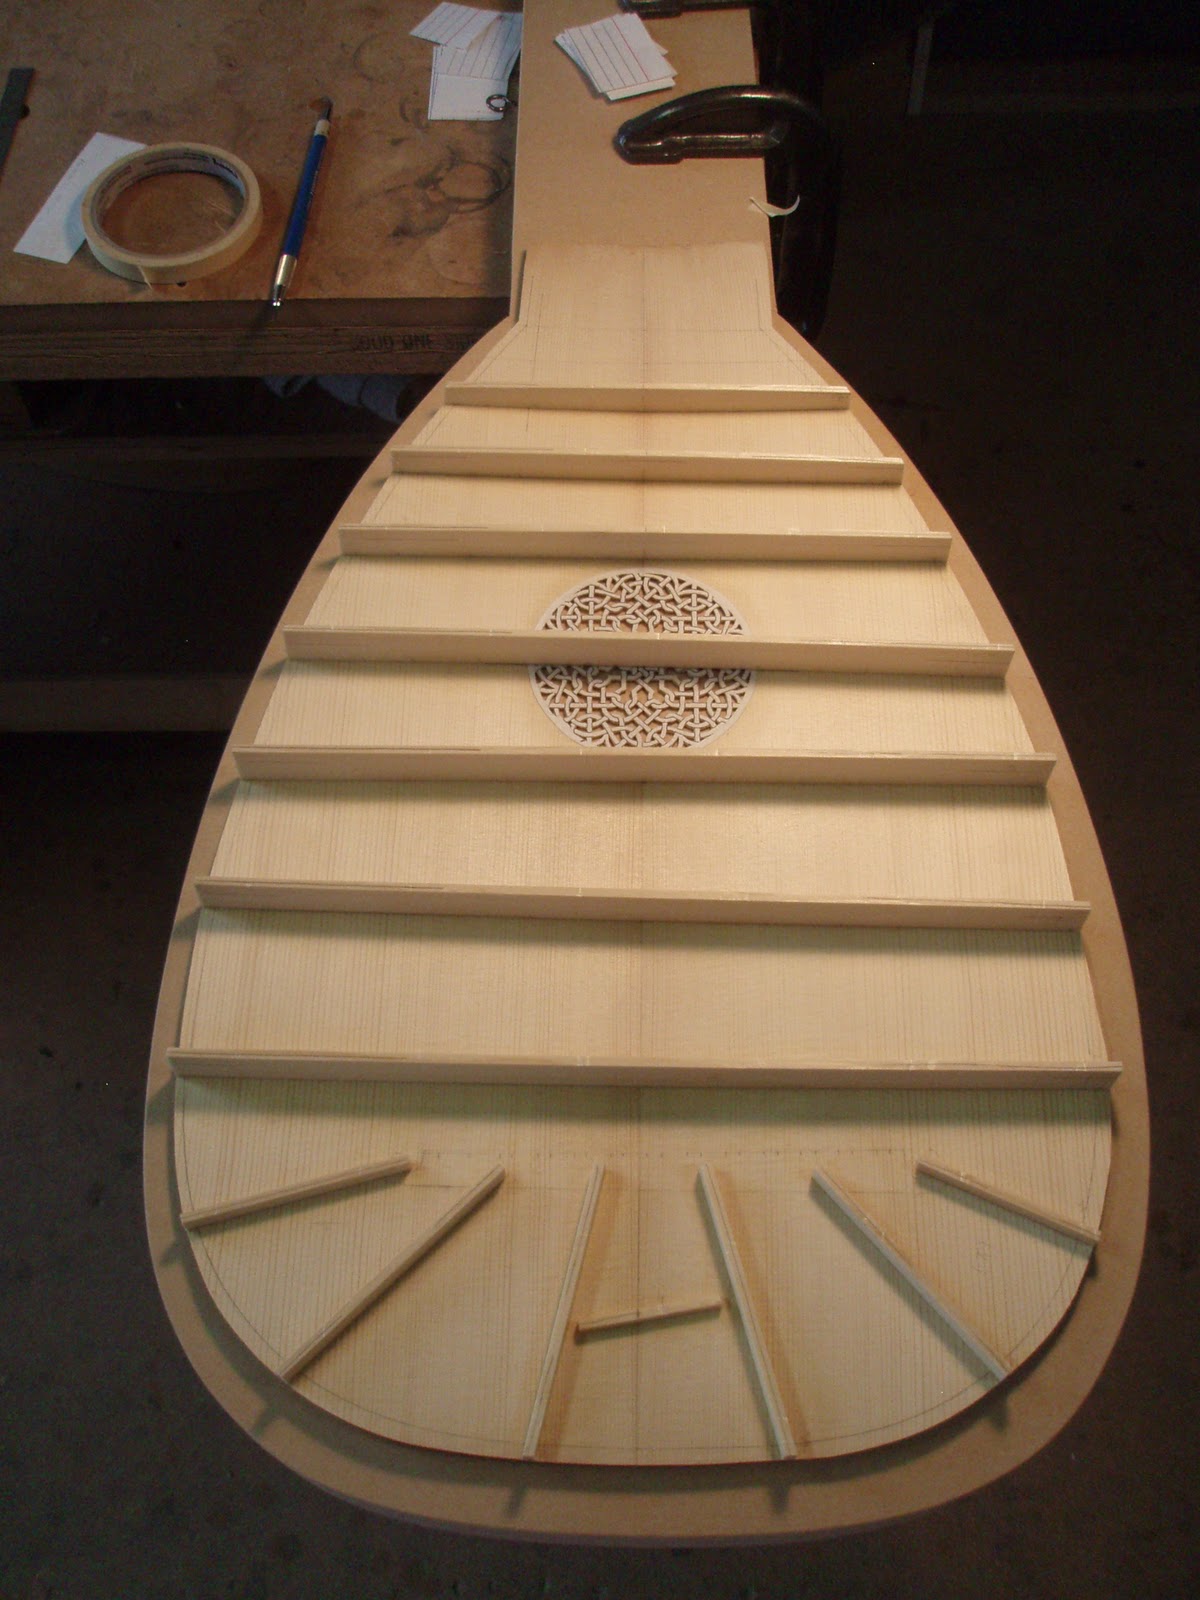
Today's job is to glue bars on the underside of the soundboard (or the belly, as it's called in the trade). These bars are "innards" of the lute, and they function exactly the same way your innards do: they provide strength and structure, and ensure that the whole body functions harmoniously (and keeps you singing sweetly....)
The barring patterns for these three lutes are all basically similar, but there are some important differences. I don't want to launch into a big discussion of lute barring here--I'll only say that within some basic parameters, there are just about endless possibilities for varying the height, thickness, and location of one or all of the bars, and each of these adjustments will have an effect on the sound of the lute.
I've devised a barring scheme for each lute, based on historical evidence. I've selected barring material from my stock of fine European spruce, creamy-white, close-grained and stiff, and cut and planed each piece to the correct dimension. My hide glue is ready, heated to the correct temperature and diluted to the correct consistency. I'm just about ready to go....but wait.
In a minute, I'm going to be gluing a dozen or so bars to the underside of the belly--that's going to involve a lot of clamping. I don't have enough clamps in my whole shop to do it, and even if I did, I couldn't put all those clamps on the belly at once--there just wouldn't be room for them. I suppose I could glue a few bars down, let the glue dry, then glue on a few more, but the whole job would take days. At the same time, gluing a few bars at different times and in different shop humidities might introduce tensions into the soundboard that could eventually end up cracking it, and causing a lot of other problems. So what's the solution?
The solution is a contraption called a go-bar deck. Lots of lute makers and guitar makers use them, and they are a miracle. Not the simplest thing to use--it gets to be quite a forest in there toward the end of the job, and the one thing you do not want to do is accidentally nudge one of those sprung bars--but once you are ready to start the job, it's pretty much guaranteed that in an hour or so you'll be done, and all the bars will be glued on at the correct humidity. Here's what it looks like, fully-loaded, all bars glued and stuck down, held in place by flexible bars made of red oak. (My glue pot on the hot plate is just on the left.)

Here's a closer shot:

And one from the back side, showing a better view of the belly and bars.

This go-bar deck was kindly lent to me by Grant Tomlinson. (His workshop is just down the hall--we'll go visit him and see what he's been up to in a future post.)
So that's another big job done. I'll leave it to dry overnight, then next morning carefully remove the go-bars and set the belly aside. Then later on in the afternoon, I'll glue the bars on the next belly... and the next day, glue the bars on the third.
Hi Trav:
ReplyDeleteGreat work. I can't believe I'm the first person to post a comment on your nifty blog. Right now I feel like a few of my bars need reglueing but I don't know about the go-bar deck! I might start complaining before the glue dries hard. Wow, these three lutes are starting to take shape, maybe you will be starting on another set soon.